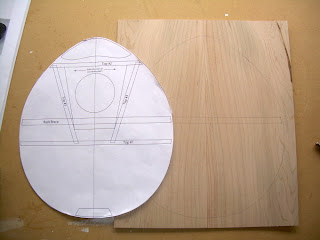
I started off by shaping the braces for the top and back. The kit includes a specially sized “sanding stick” made of ¼” plywood. They even included a little piece of the same plywood for use as a caul for clamping the stick to the benchtop. The kit designers thought this step out well, and planned for it well, too – the caul that was included for the outside of the sides at the neck block it just the right height at the edges to result in the proper radius of curvature when used to elevate the non-clamped part of the stick. The following pictures should give some idea of what the heck I'm talking about:
The photo on the left shows the stick clamped to the benchtop and propped up at the other end using the neck block caul. A clamp holds the neck block caul in place – I found that the two clamps at the bench kept the stick from rotating sufficiently. As directed by the instructions I also supported the stick at two other points along its length; one of the supports is the tail block caul and the other is a piece of scrap left over from the toolbox I built for my son for his birthday. The picture on the right shows the same setup from above just for clarity. You can see the self-adhesive sandpaper (80-grit as recommended) in the photos.
The instructions say to sand one of the braces and compare it to the drawings, adjusting the curve by moving the neck block caul in or out until the curvature is satisfactory. You then sand all of the braces using that same setup so that they are the same. I found that, by luck, my setup worked out very well the first time, so I went about sanding all of the braces to the curvature shown on the plans (which the instructions helpfully tell me is about an 8' radius).
The picture on the left is an action shot of me sanding one of the braces. I used a longitudinal motion to sand them – that is along the length of the stick and not side to side across it. This just seemed easier and the results were good, so I guess it's OK – at any rate it matched the grain direction so it made for clean sanding. The photo on the right shows the completed braces. Note that there are two #3 braces.
The next step is rough-cutting the back and top. I had not originally planned to do this today, but the shaping of the braces went so well and so quickly that I decided to have at it. The instructions say to cut the top and back with a bandsaw if you have one. Since I do I decided to give this a shot.
Up until today I had not had luck with my bandsaw, which I bought used (along with almost all of the rest of my stationary power tools) from a guy who was liquidating his shop. I examined the saw and realized that I had not been setting the damned thing up correctly. Not one of the cuts I had tried with it had been successful until today. Today I adjusted the tensioner more carefully and realized that I had not been properly adjusting the blade guide. After having done this the saw cut like a dream. Lesson learned – adjust your bandsaw carefully for each situation and it will cut much, much better.
I used the bandsaw to cut out the back and sides (the instructions tell you to leave about ¼” proud for later trimming to the actual shape of the instrument). Because I was not being very careful about accuracy since I was leaving the cut proud it went fast. I first had to mark the brace on the back and trace the outline (the left photo) and then cut it out on the bandsaw (the right photo).
Flush with my success I then cut out the top as well.


No comments:
Post a Comment