Because of a little glitch in timing today I got to work on the mandolin again. I only did a little bit of work, but it's still nice to get out there!
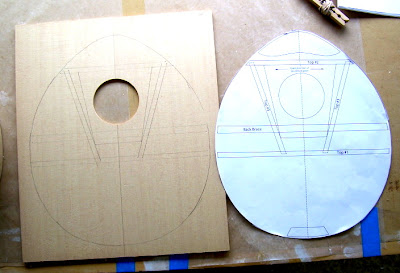
The task for today was to transfer the bracing pattern to the inside of the top and apply the soundhole patch (the soundhole patch is explained in a post below). In order to do that it was necessary to cut out one of the patterns of the top of the instrument. As an engineer I am loathe to work on an original document. I had therefore prepared for this by making photocopies of the pattern in question. Using the Xacto knife, I cut out the pattern for the top.
I then marked a centerline on the inside of the top. Using the centerline, and the soundhole already cut in the top by the kit manufacturer, I centered the cut out pattern on the top and traced around it to mark the approximate shape of the top. I then used the tip of my mechanical pencil (0.5mm!) to press through the pattern at the corners of all the braces, leaving dimples in the wood that I connected with the pencil and the straightedge to complete transferring the brace pattern (this is the method recommended by the instructions).

The final step was to glue the soundhole patch to the top. I did this using the Titebond. The instructions recommend using a weight instead of clamps for this operation - this made sense to me, so you can see the 30 cal ammo box I keep tools from my old Jeep in used as a weight. Because the bottom of the ammo box is not flat I used a cutoff of MDF, originally used as a spacer during glueup on another project (the markings on it have nothing to do with the mandolin) as a caul. A piece of waxed paper under the top, and one between the soundhole patch and the caul, prevent the top from sticking to the table and the caul.

